Moving can be a monumental task, and the thought of relocating large, heavy furniture like a bunk bed often adds an extra layer of dread. These space-saving solutions, while practical in daily life, transform into formidable challenges on moving day. Attempting to maneuver an assembled bunk bed through narrow hallways or tight doorways is an exercise in futility, risking damage to your home and injury to yourself. Fortunately, with the right approach and a few essential tools, disassembling even the heaviest bunk bed can be a straightforward DIY project. This comprehensive guide will walk you through each step, ensuring your bunk bed is safely and efficiently prepared for its journey to a new location.
Why Disassemble Your Bunk Bed for Moving?
|
Our Picks for the Best Bunk Bed in 2026
As an Amazon Associate I earn from qualifying purchases.
|
||
| Num | Product | Action |
|---|---|---|
| 1 | Breling Bunk Bed Privacy Curtains 3 Panel Play Curtain Set for Low Bunk Loft Bed with Felt Flag Double-Layer Gauze Playhouse Accessories with Tote Bags for Boy Girl Birthday Party Gift |

|
| 2 | FDW | 6 Inch Twin Mattress | Medium Firm | Gel Memory Foam Mattress | White | Bed in a Box, CertiPUR-US Certified | Pressure Relief, Cooling Ventilated Foam | Washable Removable Cover |
|
| 3 | Delta Children Twin Loft Bed with Guardrail and Ladder + Tent (Bundle), White/Disney Princess |
|
| 4 | DICTAC Twin Over Twin Bunk Bed with 8 Storage Drawers and Led Lights Metal Bunk Beds with Storage Headboard and Charging Station,L-Shaped bunk Bed for Kids/Teen with Safety Guardrail and Ladder,Black |
|
| 5 | Zinus Narrow Twin Mattress (30” Wide x 75” Long), 6 Inch Foam & Spring Hybrid Mattress for Bunk Beds, Trundles, RVs & Compact Spaces, Medium Firm Feel, CertiPUR-US Certified |
|
| 6 | VIAGDO Low Loft Bed Twin Size with 9 Storage Drawers and LED Lights, Metal Twin Loft Bed with Stairway Shelf Storage, Low Loft Bed with Safety Guardrail and Under-Bed Hideaway for Kids, White |
|
| 7 | Spider-Man Loft Bed Tent - Curtain Set for Low Twin Loft Bed (Bed Sold Separately) by Delta Children |
|
| 8 | Students Dorm Bunk Bed Curtain Home Privacy Bed Shading Curtain Net Bed Cloth Dustproof Blackout Bed Canopy Bedding Curtain Students Dormitory Tent Lightproof Cloth Bedding Canopy Spread Curtain |
|
| 9 | Twin Over Twin Metal Bunk Bed with LED Lights, USB Charging Station, 2 Drawers, Guard Rails & Ladder – No Box Spring Needed, Easy Assembly, White |
|
| 10 | Disney Princess Loft Bed Tent - Curtain Set for Low Twin Loft Bed (Bed Sold Separately) by Delta Children |
|
Disassembling a bunk bed before moving is not just about convenience; it’s about safety and protecting your investment. Trying to move a heavy, assembled bunk bed can lead to significant risks. First and foremost, it drastically reduces the chance of personal injury. Bunk beds are often awkward and heavy, making them prone to causing strains or falls during transport. Secondly, taking the bed apart protects its components from damage, such as scratches, dents, or broken joints, which can easily occur when forcing a large item through tight spaces. Disassembly also safeguards your home, preventing scrapes on walls, doorframes, and floors. Finally, broken-down components are far easier to load into a moving truck or storage unit, optimizing space and simplifying the overall moving logistics.
Essential Tools and Materials for Disassembly
Before you begin, gathering the right tools and materials is crucial for a smooth and efficient disassembly process. Having everything at hand will prevent frustrating delays and ensure the job is done correctly.
- Screwdrivers: You’ll likely need both Phillips-head and flathead screwdrivers to tackle various types of fasteners.
- Allen Wrenches (Hex Keys): Many modern bunk beds use hex bolts, so a set of Allen wrenches will be indispensable.
- Adjustable Wrench: This can be useful for gripping and turning larger bolts.
- Rubber Mallet (or Hammer with a cloth): For gently tapping stubborn joints or loosening parts without causing damage.
- Pliers: Handy for gripping tight or rusted fasteners.
- Plastic Bags and Labels/Marker: Essential for organizing and identifying screws, bolts, washers, and other small hardware. Labeling ensures you know exactly where each piece belongs during reassembly.
- Protective Gloves: To prevent cuts, splinters, and provide a better grip.
- Safety Glasses: To protect your eyes from any debris or accidental mishaps.
- Moving Blankets or Old Sheets: For padding and protecting larger components during storage and transport.
- Camera or Smartphone: To take reference photos of the bed before and during disassembly, which will be invaluable for reassembly.
Step-by-Step Guide to Disassembling a Heavy Bunk Bed
Disassembling a heavy bunk bed requires a methodical approach, ideally with the help of a partner, to ensure safety and prevent damage.
Preparation and Safety First
Begin by clearing the room. Move any nearby furniture, toys, or obstacles to create ample workspace around the bunk bed. You’ll need enough room to walk around the bed freely and lay down dismantled parts without tripping. Always ensure you have a helper for this task, especially when dealing with heavy components like the top bunk. Wear protective gloves and closed-toe shoes to minimize the risk of injury. If you have the original assembly manual, review it; it can provide specific instructions for your model. Crucially, take several photos of the bunk bed from different angles before you start. These visual aids will be your best friend during reassembly.
Remove Mattresses and Bedding
The first and most straightforward step is to strip the bed completely. Remove all pillows, blankets, sheets, and finally, the mattresses from both the top and bottom bunks. Place them aside in a separate room or a designated clear area where they won’t impede your work. This immediately makes the structure lighter and provides clear access to the bed frame.
Detach Ladders and Guardrails
Next, focus on removing any attached accessories. Most top bunks feature guardrails for safety, and nearly all bunk beds have a ladder. Use your screwdriver or Allen wrench to loosen and remove the screws or bolts securing these components. As you remove each piece of hardware, immediately place it into a labeled plastic bag. For instance, a bag might be labeled “Ladder Bolts” or “Top Bunk Guardrail Screws.” Set the detached ladder and guardrails aside.
 A person carefully placing small screws into a labeled plastic bag during bunk bed disassembly, with an Allen wrench nearby
Remove Mattress Slats and Support Beams
Underneath the mattresses of both bunks, you’ll find slats or a Bunkie board that support the mattress. These are typically held in place by screws, pegs, or simply rest within the frame. Carefully remove all screws or fasteners holding the slats, then lift them out. Stack them neatly in a corner, perhaps tying them together with rope or tape to keep them organized. This step further reduces the weight and exposes the main bed frame connections.
Separate Top Bunk from Bottom Bunk
This is often the most critical and challenging step for heavy bunk beds, and it absolutely requires at least two people. The top bunk is usually secured to the bottom frame with long bolts, dowels, or connecting posts at each corner. Locate all the fastening points where the upper and lower bunks connect. Use the appropriate tools (Allen wrench, screwdriver, or adjustable wrench) to systematically loosen and remove these bolts. As you unfasten them, your helper should stabilize the top bunk to prevent it from shifting or falling. Once all fasteners are removed, carefully and evenly lift the entire top bunk frame off the bottom bunk. Place it gently on a padded surface on the floor to prevent damage.
Disassemble Bed Frames
With the top bunk separated, you can now focus on dismantling the individual frames. Start with the top bunk frame, then move to the bottom. Each frame typically consists of headboards, footboards, and side rails. Locate all remaining bolts and screws connecting these pieces. Work systematically, loosening and removing fasteners from one section at a time. For wooden beds, if pieces are stuck, a gentle tap with a rubber mallet can help loosen joints; never force them apart as this can cause splintering or damage. As you dismantle each section (e.g., “Top Bunk Headboard,” “Bottom Bunk Side Rail”), label them clearly with masking tape and a marker, and immediately place their corresponding hardware into a labeled bag.
Secure and Protect Components
Once all parts are disassembled, organize them for moving. Stack larger pieces like headboards, footboards, and side rails neatly. Wrap wooden or painted components in moving blankets, bubble wrap, or old sheets to prevent scratches and dents during transit. Taping the labeled hardware bags directly to their corresponding bed frame pieces can be incredibly helpful for reassembly. Ensure all components are stored in a designated, secure area, away from foot traffic, until moving day.
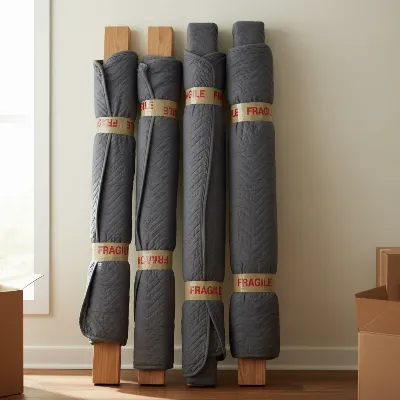 Moving blankets wrapped around disassembled bunk bed frame pieces for protection during transport
Tips for Moving Heavy Bunk Bed Components
Even when disassembled, some bunk bed components can remain heavy and awkward. Proper lifting and handling techniques are essential:
- Lift with Your Legs: Always bend your knees and lift with your legs, not your back, to prevent injury.
- Get Help: Never attempt to lift overly heavy or bulky pieces alone. Utilize your helper for all significant lifting.
- Use Straps: Moving straps can distribute weight and make carrying large items easier, especially through doorways.
- Clear Path: Ensure your path to the moving truck is completely clear of obstacles.
- Vehicle Arrangement: Load the heaviest, most durable pieces first in the moving vehicle, positioning them securely against the walls. Place lighter, more fragile components on top or between heavier items, ensuring they are well-padded.
Reassembly Tips
The beauty of careful disassembly is a smoother reassembly. When you’re ready to put your bunk bed back together, simply reverse the steps. Refer to the photos you took during disassembly, and consult the manufacturer’s manual if you have it. Always start with the bottom frame, ensuring it’s level and stable before adding slats and then the top bunk. Double-check that all bolts are tightened securely to ensure the bed’s stability and safety.
Conclusion
Disassembling a heavy bunk bed for a move doesn’t have to be a source of stress. By following a systematic, step-by-step approach, gathering the right tools, and prioritizing safety with an extra set of hands, you can efficiently break down your bunk bed into manageable components. This not only protects your furniture and your home but also streamlines the entire moving process. Remember, careful labeling and proper protection of each part will be your greatest allies when it’s time to reassemble your bunk bed in its new home, ready to provide comfort and functionality once more. What part of the disassembly process do you anticipate being the most challenging for your specific bunk bed?
Frequently Asked Questions
Can I move a bunk bed without disassembling it?
While technically possible for very small or lightweight models, it is generally not recommended, especially for heavy bunk beds. Moving an assembled bunk bed significantly increases the risk of injury, damage to the bed frame, and scrapes to your home’s walls and doorways. Disassembly makes transport safer and more efficient.
How long does it typically take to disassemble a heavy bunk bed?
The time required depends on the bunk bed’s complexity and your experience level. On average, with a helper and all tools ready, disassembling a standard heavy bunk bed can take anywhere from 1 to 3 hours. More intricate designs with integrated storage or desks might take longer.
What should I do if a screw is stripped or a part is stuck?
If a screw is stripped, try placing a rubber band over the screw head before inserting the screwdriver to increase grip. For stuck parts, a gentle tap with a rubber mallet can often loosen them. You can also apply a small amount of penetrating oil to stiff joints or rusted fasteners and allow it to sit for a few minutes before trying again.
Is it necessary to label every single screw and bolt?
Yes, labeling all hardware is highly recommended. While it might seem tedious, clearly labeling plastic bags with the specific parts they belong to (e.g., “Top Bunk Guardrail Bolts”) will save significant time and frustration during reassembly, ensuring no pieces are lost or misplaced.
When should I consider hiring professional help to disassemble my bunk bed?
You should consider professional assistance if your Bunk Bed is exceptionally large, unusually complex, integrated with other furniture, or if you feel uncomfortable or unsafe attempting the disassembly yourself. Professionals have the right tools, experience, and manpower to handle challenging disassemblies safely.